
Are your gel nails looking grown-out or chipped? Ready for a fresh color but can’t make it to the salon? Learning how to remove gel nail polish at home will save you time, money, and potential nail damage. With the right technique, you can safely eliminate gel polish without harming your natural nails underneath.
Quick Answer: How to remove gel nail polish at home involves filing the shiny topcoat, applying acetone-soaked cotton to each nail, wrapping fingertips in foil, waiting 10-15 minutes, and gently pushing off the softened gel. Follow with intense moisturizing to counteract acetone’s drying effects.
Doing your own gel removal isn’t just budget-friendly—it’s also incredibly convenient when you need a polish change without the salon visit. Let me walk you through the fail-proof process to how to remove gel nail polish that nail technicians trust.
Essential Supplies: What You’ll Need to Remove Gel Nail Polish
Before starting your at-home gel removal, gather these crucial items for how to remove gel nail polish properly:
- 100% pure acetone (not regular nail polish remover)
- Coarse nail file (100/180 grit)
- Fine buffer block
- Cotton balls or pads (cut into nail-sized pieces)
- Aluminum foil (pre-cut into 3×3 inch squares)
- Wooden cuticle pusher or orange stick
- Cuticle oil
- Rich hand cream
- Petroleum jelly (optional for skin protection)
- Small glass bowl (optional for alternative soaking method)
Everything is lot more productive and efficient if you have everything ready before you start.
How to Remove Gel Nail Polish: Step-by-Step Foil Method
Step 1: Set Up Your Workspace
What to do: Place a towel or paper towels on a flat, comfortable surface where you’ll perform your how to remove gel nail polish process.
Why it matters: Acetone can damage furniture, countertops, and fabrics. Creating a protected workspace prevents permanent damage to your surfaces.
Step 2: Break the Seal by Filing
What to do: Using your coarse nail file, gently buff the surface of each nail until the shine disappears completely – this is a critical first step in how to remove gel nail polish safely.
Why it matters: This crucial step breaks the protective seal of the top coat, allowing acetone to penetrate and dissolve the gel layers beneath.
WARNING: Don’t file too aggressively! You don’t need to sand all the way down to your natural nail; you only need to eliminate the shine. Light pressure is sufficient.
Step 3: Shield Your Skin (Highly Recommended)
What to do: Apply petroleum jelly to the skin surrounding your nails and cuticles.
Why it matters: This creates a protective barrier that prevents the acetone from excessively drying out your skin during the removal process.
Step 4: Prepare Your Acetone-Soaked Cotton
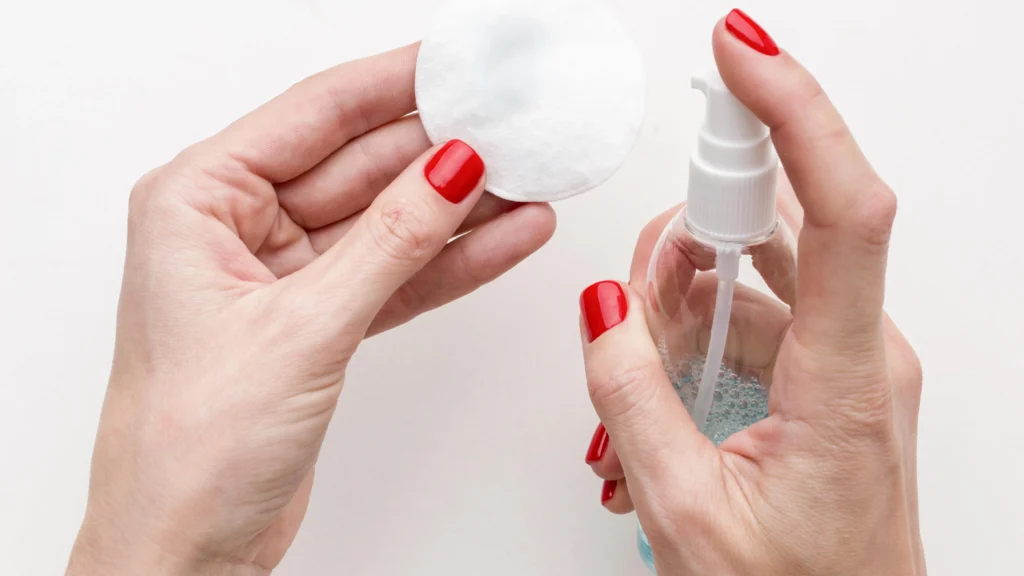
What to do: Saturate each cotton piece with 100% acetone. The cotton should be wet but not dripping.
Why it matters: The cotton holds the acetone against the nail surface, ensuring continuous contact for effective gel breakdown.
Step 5: Apply Cotton and Wrap with Foil
What to do:
- Put a cotton piece soaked in acetone straight onto your nail.
- Immediately wrap your fingertip tightly with foil
- Pinch the foil at the tip to secure
- Repeat for all fingers (start with your non-dominant hand)
Why it matters: The foil wrap creates a mini-greenhouse effect, trapping heat and preventing acetone evaporation while keeping the cotton firmly pressed against the gel polish. This is the most effective way how to remove gel nail polish without damaging your natural nails.
Step 6: Wait Patiently (10-15 Minutes)
What to do: Give the acetone at least ten minutes to work, then set a timer. For stubborn gel or multiple layers, you may need up to 20 minutes. Understanding that patience is key to how to remove gel nail polish properly.
Why it matters: Rushing this step is the #1 cause of nail damage during at-home removal. The acetone needs time to fully break down the gel polish structure.
PRO TIP: Occasionally apply gentle pressure to each wrapped fingertip to help the acetone penetrate more effectively.
Step 7: Check One Nail First
What to do: Carefully unwrap one nail to check progress. The gel should appear lifted, bubbled, or cracked.
Why it matters: Testing one nail prevents others from re-hardening if more soaking time is needed.
Step 8: Remove Softened Gel Polish
What to do: Using your wooden cuticle pusher, gently push the softened gel polish from cuticle to tip. The gel should slide off easily with minimal pressure.
Why it matters: Proper removal direction prevents nail damage and layer separation.
CRUCIAL ADVICE: If the gel isn’t coming off easily, STOP! Re-wrap with fresh acetone-soaked cotton for another 5-10 minutes. Never force or scrape stubborn gel—patience prevents permanent damage.
Step 9: Buff Away Any Residue (If Necessary)
What to do: For any tiny remaining gel spots, lightly buff with the fine buffer block using minimal pressure.
Why it matters: Gentle buffing removes last traces without thinning your natural nail plate.
Step 10: Restore Moisture Immediately
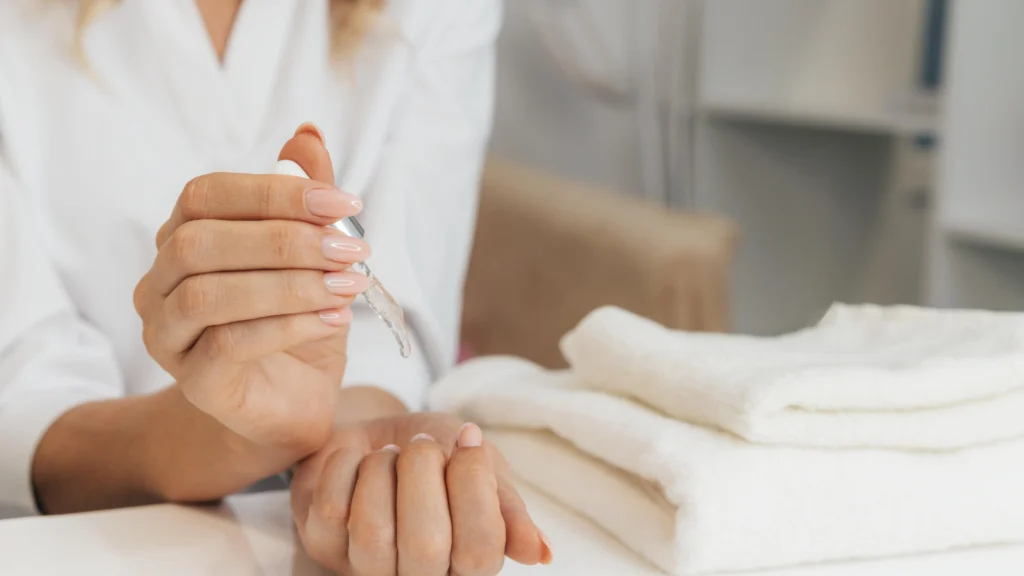
What to do:
- Wash hands thoroughly with soap and water
- Apply cuticle oil generously to each nail and surrounding skin
- Follow with rich hand cream massaged into hands and nails
Why it matters: Acetone severely dehydrates nails and skin. Immediate moisture restoration prevents brittleness, peeling, and cracking.
Alternative Technique: The Bowl Soaking Method for Gel Removal
If foil wrapping feels too cumbersome, you might prefer this alternative method for how to remove gel nail polish:
- Pour enough acetone into a small glass bowl to cover your fingertips
- Submerge fingertips for 10-15 minutes
- Follow removal steps 7-10 above
| Method | Pros | Cons | Best For |
|---|---|---|---|
| Foil Method | Less acetone used, better contact, less evaporation | Requires more preparation | Most effective overall results when learning how to remove gel nail polish |
| Bowl Soaking | Simpler setup, can see progress | Uses more acetone, more skin exposure, faster evaporation | Quick removal of thin gel layers |
5 Critical Mistakes When Removing Gel Polish (And How to Avoid Them)
1. Peeling or Picking Off Gel Polish
The damage: Removes layers of your natural nail, causing thinning, weakness, and painful splitting.
The solution: Always use the acetone soaking method for how to remove gel nail polish, even if it takes longer.
2. Over-Filing Your Natural Nail
The damage: Creates nail weakness, ridges, and potential pain.
The solution: File only until the shine disappears—focus on removing gloss, not color.
3. Rushing the Soaking Process
The damage: Forces you to scrape harder, damaging nail layers.
The solution: When it comes to how to remove gel nail polish effectively, set a timer and be patient—better to soak longer than to damage your nails.
4. Using Regular Nail Polish Remover
The damage: Ineffective removal requiring excessive scraping.
The solution: Only use 100% pure acetone for how to remove gel nail polish properly.
5. Skipping Post-Removal Hydration
The damage: Dry, brittle nails prone to breaking and peeling.
The solution: Always follow with cuticle oil and hand cream immediately after removing gel polish.
Post-Gel Nail Recovery: Essential Aftercare Tips
The way you treat your nails after learning how to remove gel nail polish determines their future health:
- Apply cuticle oil 3-4 times daily for the first 48 hours after removal
- Keep nails short while they recover their strength
- Consider a nail strengthener if nails feel particularly weak
- Take a one-week polish break between gel manicures when possible
- Wear gloves for cleaning and washing dishes to prevent further drying
| Nail Condition | Recommended Treatment | Recovery Time |
|---|---|---|
| Slightly dry | Daily cuticle oil, regular moisturizer | 3-5 days |
| Peeling/splitting | Nail strengthener, cuticle oil, no polish | 1-2 weeks |
| Very thin/damaged | Nail repair treatment, biotin supplements, protection from water | 3-4 weeks |
| White spots/ridges | Specialized ridge-filler, gentle buffing, nail hardener | 2-3 weeks |
Top Questions About Removing Gel Polish Answered
How often can I safely remove gel polish at home?
Most nail professionals recommend limiting gel manicures to once a month with proper removal techniques. Knowing how to remove gel nail polish correctly is essential for maintaining nail health between applications.
Will my nails be damaged after removing gel polish?
When removed correctly following this guide on how to remove gel nail polish, gel polish shouldn’t cause significant damage. It’s improper removal (peeling, excessive filing, forcing) that harms nails.
How can I make gel removal less drying to my skin?
When learning how to remove gel nail polish at home, apply petroleum jelly generously around each nail before starting, use finger cots instead of full foil wraps, and immediately apply oil and cream after removal.
How quickly can gel polish be removed at home?
While there are no truly “quick” methods that are also safe when considering how to remove gel nail polish, pre-filing thoroughly and using body heat (wrapping hands in a warm towel during soaking) can speed up the process slightly.
Can I reuse acetone for future gel removal?
It’s not recommended when practicing how to remove gel nail polish at home. Acetone that has dissolved gel polish becomes less effective. For best results, use fresh acetone each time.
Ready for Fresh Nails: Final Thoughts on Gel Polish Removal
Knowing how to remove gel nail polish properly is an essential skill for anyone who loves gel manicures but wants to save time and money. By following this detailed guide and avoiding common mistakes, you can safely change your gel color whenever needed while keeping your natural nails strong and healthy.
Remember that the key to damage-free removal is patience—never force gel polish off your nails! With practice, learning how to remove gel nail polish becomes second nature and your nails will thank you for the gentle care.
Looking for the best techniques on how to remove gel nail polish for your specific nail type? Have a specific gel removal challenge or tip to share? Leave a comment below! Curious about the safest methods for how to remove gel nail polish for sensitive nails? Check out our trending nail care guides for this season!
